An increasingly common approach to roguelike map development today is to have content partially determined by so-called “prefabs,” with layouts which are hand-made rather than fully procedurally generated. Doing so gives a designer more control over the experience, or portions of it at least, without completely supplanting the advantages of roguelike unpredictability.
Prefabs are a great way to add more meaning to a map, which when otherwise generated purely procedurally and visited again and again by a determined YASD survivor is often going to end up feeling like “more of the same” without a little manual help to shake things up. Yes, even procedural maps get boring once players start to see through their patterns! Not to mention the general lack of anything that really stands out…
Background Reading
I’ve written and demonstrated a good bit about map generation before, including the basics of how I create prefabs for Cogmind, starting with essentially drawing them in REXPaint. This method is light years ahead of the old “draw ASCII in text files” method I was using with X@COM (now that I have REXPaint, I’m definitely going to have to go back and convert that system, that’s for sure!).
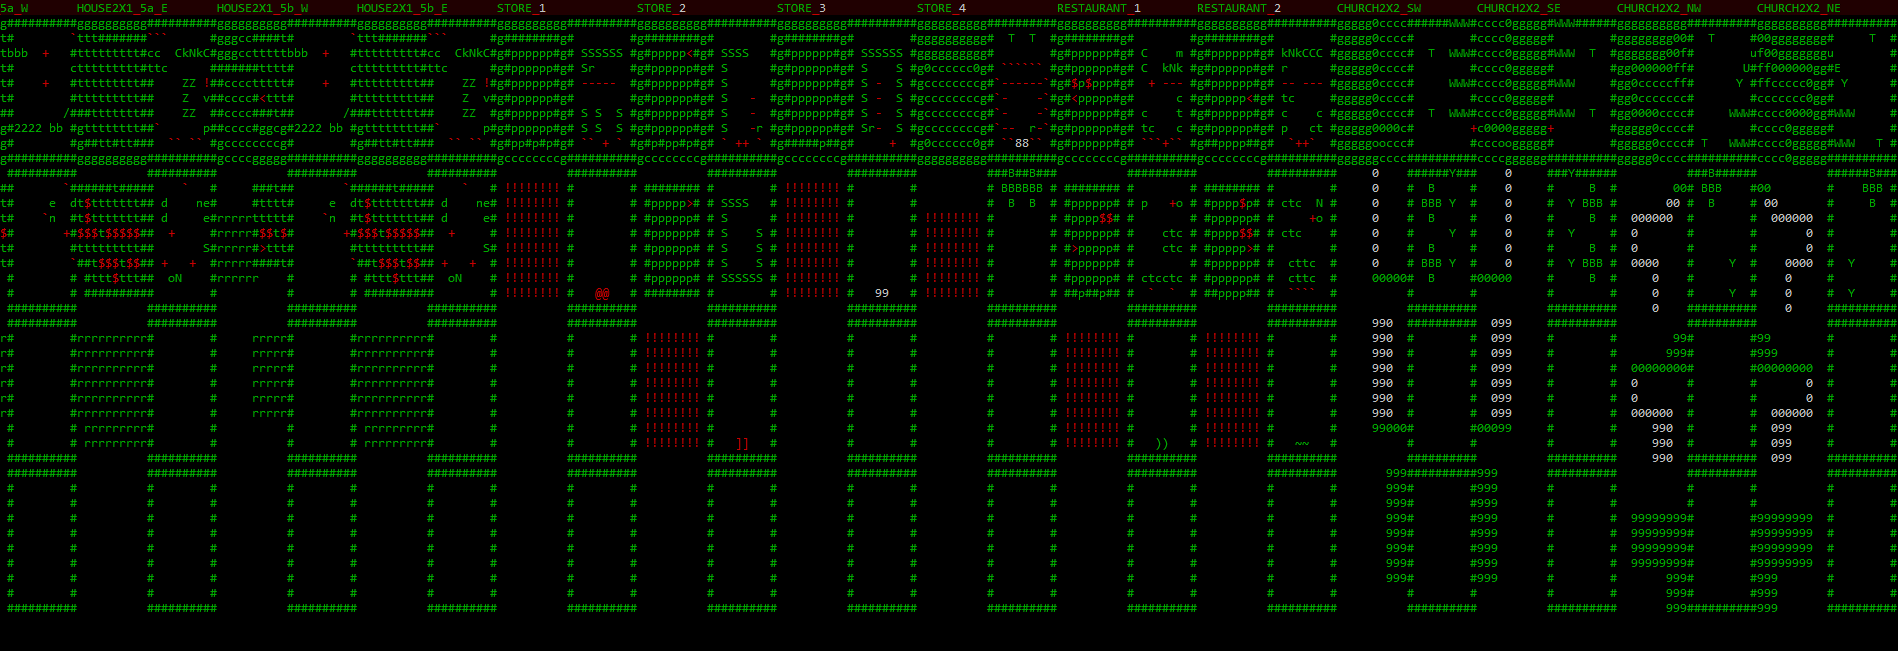
Sample X@COM map prefab excerpt, typed! In text! The horror! (At least it used a little bit of syntax highlighting to help pick out important features…)
And once prefabs are created, one of the major challenges is how to actually get them into a procedural map. After all, they need to seem like they belong! Previously I demonstrated some methods for handling that part of the process in cave-style maps, namely geometric centering (sample) and wall embedding (sample). Read the full post regarding that style over at Generating and Populating Caves.
But most maps in Cogmind are not caves, instead falling under the room-and-corridor style. Naturally these other maps will require different methods for embedding prefabs, and below I’ll be sharing these methods in addition to a more detailed look at what Cogmind’s prefab definition files have evolved into over the years.
“Seeding” with Prefabs
One way to place prefabs is before map creation even begins, in fact shaping the initial generation itself. This approach is for prefabs that will help define the core feeling or difficulty of the map as a whole, thus it’s more suited to larger prefabs, or key points such as entrances and exits. It’s easier to control the absolute distance between these important locations by placing them first. So high-priority prefabs come first… that makes sense :).
As entrances and exits are essential features while also having a large impact on how a given map plays out, thus my maps are designed to place most of them first. Not all of them are handled as prefabs and are therefore beyond the scope of this article, but some special exits that require more flair, fluff, events, or other types of content use this “initial prefab” system. The first such example is found very early in the game in the form of the entrances from Materials floors into the Mines (admittedly one of the less interesting applications, but I don’t want to leak spoilers for later content).
Step 1 in the map generator is to go down a list of potential prefabs and configurations and put them on the map!
In this case, as per the feature list the generator chose to go with variant #3, which calls for two BLOCKED barriers to prevent pathways from linking areas on either side of them, in addition to two top-side MAT_00_S_1_MIN prefabs, one to the west and one to the east. Looking at the relevant feature data (those last two lines), these prefab areas block all entity spawning within their area, and have ever so slightly variable coordinate offsets (some prefabs elsewhere make much greater use of this ability to shift around).
The MAT_00_MIN file stores the data that allows the engine to decipher what objects are referenced within the prefab:
And “MAT_00_S_1_MIN” refers to the file storing the layout itself:
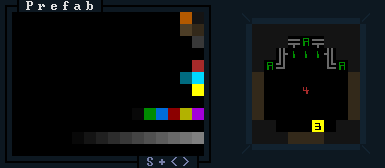
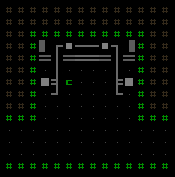
Mines entrance MAT_00_S_1_MIN prefab layout, as seen in REXPaint. (This is a multilayered image, so here you can’t see the complete machine hidden under the ‘A’s.)
The southern edge calls for a tunneler (width = 3, the yellow number) to start digging its way south to link up with the rest of the map (when its generation proper begins), while both the left and right sides are tunnellable earth in case later pathways are dug out from elsewhere on the map that would like to link up here. Those are simply other possibilities, though--the only guaranteed access will be from the southern side.
Other common candidates for initial prefabs are huge semi-static areas, sometimes as large as 25×25 or even 100×100, which play an important role on that map either for plot or mechanics purposes.
The next method is a bit more complicated…
Embedding Prefabs
Most of the prefabs in Cogmind are not applied until after the initial phases of map generation are complete. Therefore all the rooms and corridors are already there and I had to determine the most flexible approaches for adding this type of content to a map without screwing up either the prefabs or map itself.
Before going any further, though, we have to decide which prefabs to add in the first place, a decision naturally affected by the theme, depth, and other various factors associated with the map in question. That process is handled via the “encounter system” I initially described in this blog post (half-way down), but I never got into the technical side of how those encounters are selected, or how those with prefabs are actually merged with the map, which is relevant here. (*Clarification: An “encounter” refers hand-made content which may be loot, enemies, friends, or basically anything, sometimes combined with procedural elements, and sometimes but not always associated with one or more prefabs.)
In general, while there are a few types of encounters that appear across multiple maps, like rooms full of debris, each type of map has its own pool of potential unique encounters. And then there are multiple base criteria that may or may not be applicable in determining whether a given encounter is chosen:
- Depth limits: An encounter may only be allowed within a certain depth range. (I’ve actually never used this limitation because maps containing encounters generally only appear at one or two different depths anyway.)
- Count limits: An encounter may be allowed to appear any number of times, or up to a maximum number of times in a single map, or up to a maximum number number of times in the entire world (only once in the case of true unique encounters such as with a named or otherwise NPC with very specific behavior).
- Mutual exclusivity limits: Some encounters may not be allowed to appear in the same map as others. These will be marked as belonging to a certain group, and exclude all others once one is chosen.
- Access limits: Encounters can require that they only be placed in a room connected to a certain number of doors/corridors. It is common to restrict this to 1 for better prefab layout control (i.e. knowing which direction from which the player will enter makes it easier to design certain prefabs).
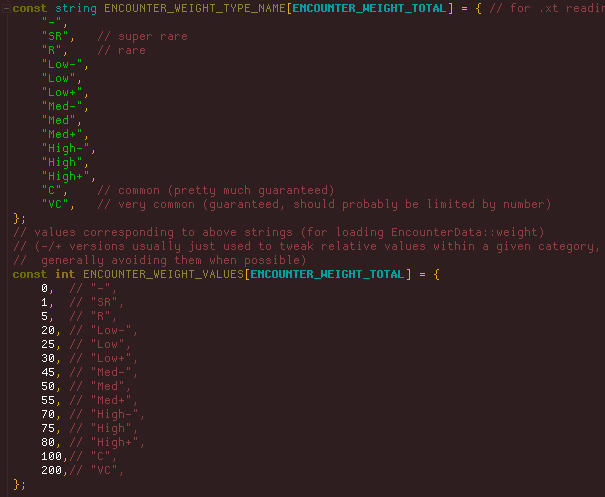
Encounters are also not given equal weight--some are common while others are quite rare. I use words/strings to assign encounter weights in the data, because they are easier than numbers to read and compare, and can be more quickly tweaked across the board if necessary (by changing their underlying values).
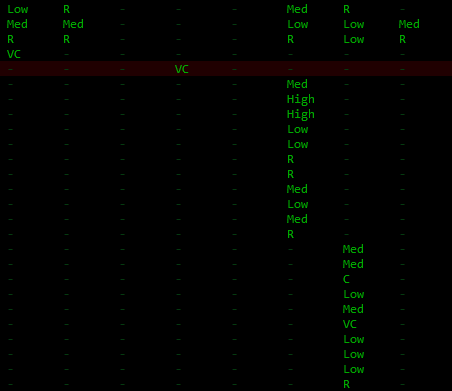
Encounter weight values (data excerpt), where each column is a different map, and each row is a different encounter.
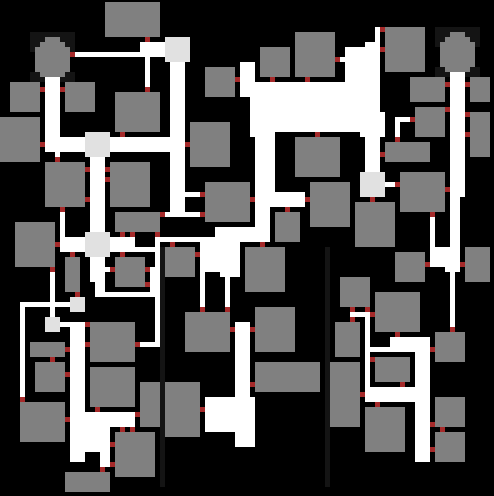
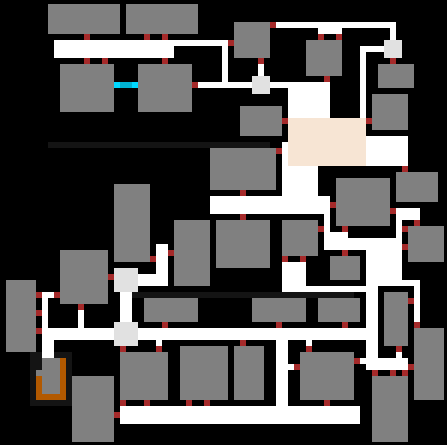
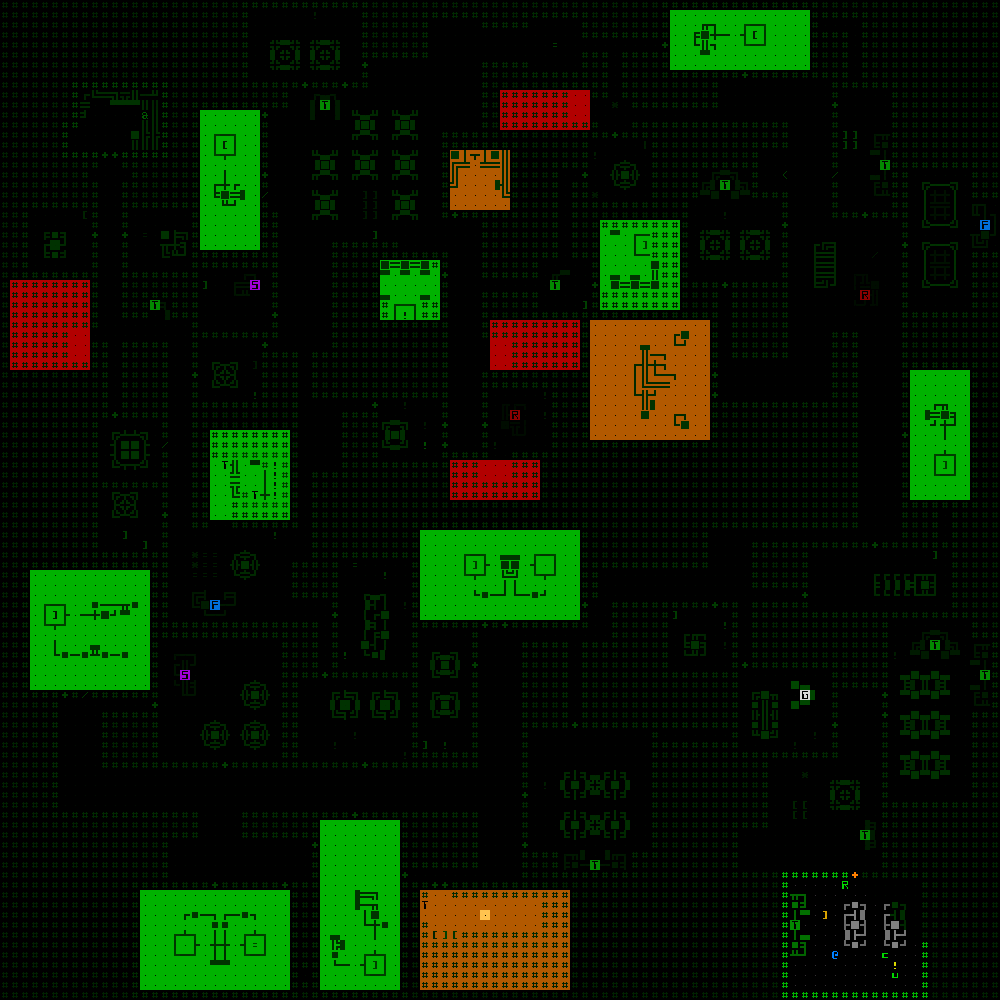
So you’ve got some prefabs chosen and a map that looks like this:
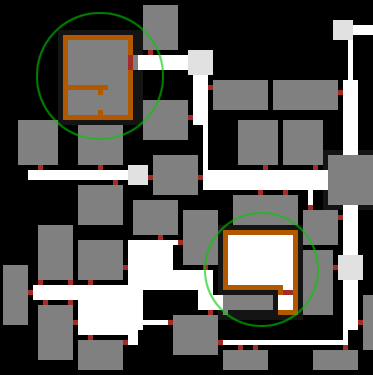
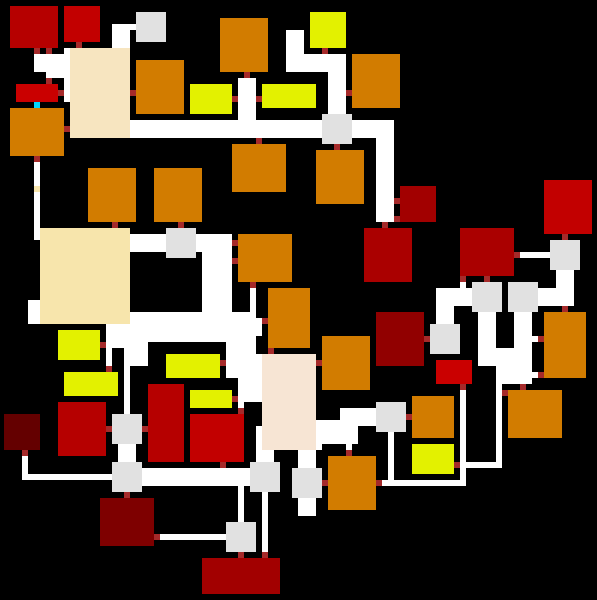
Or this:
Or something else with rooms and corridors. How do we match encounters with rooms and actually embed prefabs in there?
Unlike “seeding prefabs” described earlier, these “room-based prefabs” actually come in a few different varieties, but all share the characteristic that they are placed in what are initially rooms, as defined by the map generator. Of course the map generator must know where it placed all the rooms and their doors in the first place, info which has all kinds of useful applications even beyond just prefabs. Can’t very well place prefabs without some likely target areas to check!
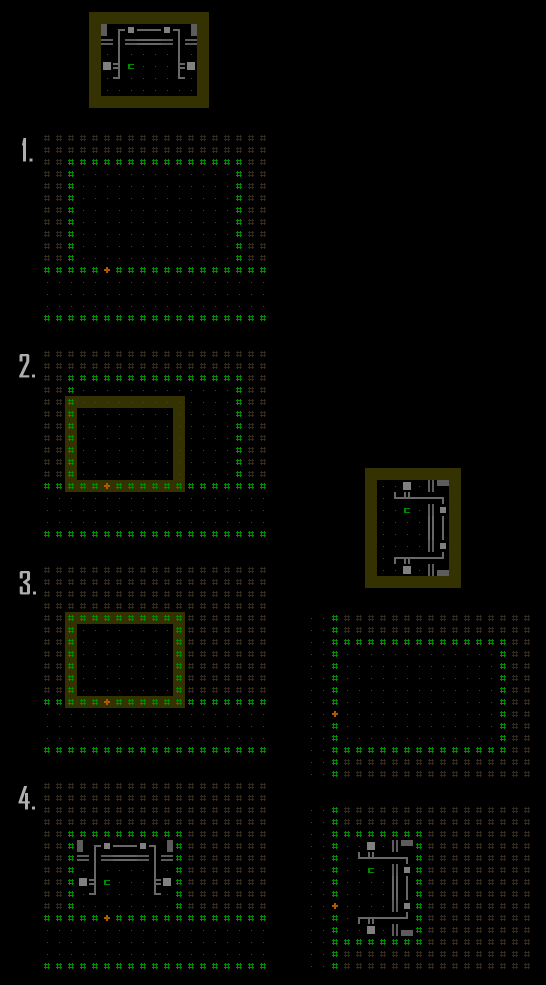
The most common prefab variety is the “enclosed room” category. A random available room is selected, then compared against the size of each possible prefab for the current encounter. (A single encounter may have multiple alternative prefabs of different dimensions, and as long as one or more will fit the current room then oversized options are simply ignored.) In order for a rectangular prefab to fit the target room it may also be rotated, which doubles as a way to provide additional variety in the results. And yet another way to expand the possibility space here is to randomly flip the prefab horizontally. (Flipping vertically is the same thing as a horizontal flip followed by 180-degree rotation, so kinda pointless :P)
- Find a room that’s large enough to hold the desired encounter/prefab.
- Find a target rectangle which borders the doorway. (The horizontal axis is randomized to anywhere that will allow the door to be along the prefab’s bottom edge. Prefabs are always drawn to face “south” by default, to establish a common baseline from which to shift, rotate, and flip them. And those with a single-door restriction are always rotated so that their bottom edge faces the door, whichever side of the room its on. This makes designing the experience much easier since you always know which direction from which the player will enter this type of prefab.)
- Prefab dimensions will generally not precisely match those of the room in which they’re placed, therefore the surplus room area is usually filled in with earth and the walls are rebuilt along the new inner edge (though the room resizing is optional--it can be left as extra open space).
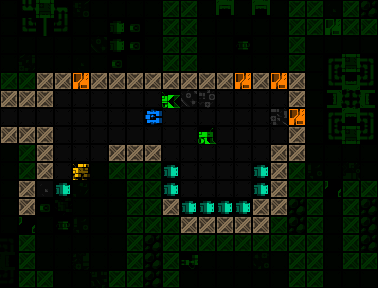
- Place the prefab and its objects, done! (rotated example shown on the right)
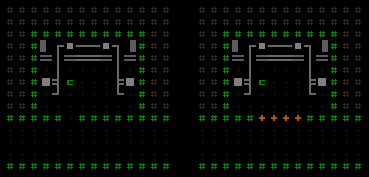
There are some further customization options as well. Doors can be expanded to multi-cell doors, like for special rooms that want to be noticeable as such from the outside (as a suggestive indicator to the player). Or the door(s) can be removed to simply leave an open entryway.
The third form shown below takes the modifications a step further by removing the door and entire front wall to completely open the room to the corridor outside, creating a sort of “cubby” with the prefab contents.
Storage depots found in Cogmind’s earliest floors use the “cubby room” design. The reason there is it makes them easy to spot and differentiate from afar, which helps since the point is to enable players to expand their inventory if necessary for their strategy.
Another “accessible room” variety is essentially like an enclosed room, but the prefab is designed to allow for maximum flexibility and access rather than expecting the room to be shrunk down to its size and new walls created. These prefabs usually don’t have internal walls and instead just become decoration/contents for an existing room without changing its structure. While it may end up in a room larger than itself and therefore have extra open space, including these types of prefabs is necessary to fill parts of the map containing rooms with multiple entry points where rooms with obstructions and walls wouldn’t do because they could illogically block off some of those paths. For the same reason, accessible room prefabs must leave all of their edges open for movement (though may contain objects that do not block movement).
- Find a room that’s large enough to hold the desired encounter/prefab (any number of access points is valid).
- Position the target rectangle anywhere in the room (random).
- Place the prefab and its objects, done!
The primary drawback of using the encounter system to place encounters in randomly selected rooms is that there is no control over relative positioning of different encounters. While it’s possible to add further restrictions or tweaks to guide placement on a macro scale, it seems to work out okay as is. The existing system does, however, also sometimes result in suboptimal placement of encounters, i.e. a smarter system could fit more into a given area, or better rearrange those that it did place to maximize available play space. But these effects are only apparent on the design side--the player won’t notice any of this.
An alternative would be to use a room-first approach, choosing a room and then finding an encounter that fits, but in my case I wanted to prioritize encounters themselves, which are the more important factor when it comes to game balance.
So overall my prefab solution is a combination of external text files and binary image files, processed by about 3,000 lines of code.
Update 220718: To see another example of embedding encounter prefabs, in a different environment with somewhat different steps, see my later coverage of Garrisons 2.0.
Inside a Prefab
So far we’ve seen how prefabs fit into the bigger picture, but another equally important aspect is what goes into a prefab itself. Each prefab must have an associated definition file (sometimes shared by multiple prefabs if they have similar contents), which is a simple text file that describes the objects found in the prefab.
My first ever prefab article (linked earlier), written two and half years ago (!), appeared before even any prefabs had been used in Cogmind. As you can guess, things have evolved since then, getting a lot more versatile and powerful as new features were added to meet new needs throughout alpha development. Here I’ll give a general rundown of those features, to give a better idea of how they work.
At the most basic level, a definition file is simply a list explaining what object each ASCII character in the prefab represents. After placing the initial prefab terrain--walls/doors/etc, the generator consults the corresponding definition file and creates those objects at the specified positions. Reference characters are written to the prefab image’s fourth layer as part of the design process (they can be any color, but I always use green for consistency).
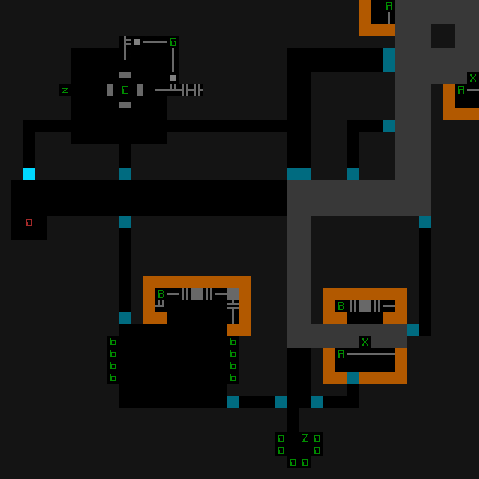
Sample prefab layout image (draw in REXPaint and stored as a compressed .xp file). Green letters and numbers all exist on the highest layer (layer 4) and refer to objects. This particular prefab represents one quarter of a garrison interior, which are built entirely from a large selection of prefabs.
In a definition file, each line corresponds to a reference, of which there are five types:
For consistency and to aid readability of prefabs when creating/editing them, I always use upper case letters for props and traps (the latter actually being a subset of the former), lower case letters for entities (robots/mobs), numbers for items, and punctuation for debris (of which only one reference is actually necessary, because the actual appearance is determined by the engine).
Note that a “tag” is the internal name for an object, which may not always match the name the player sees, to enable objects that appear the same but are actually different for whatever reason.
The above basic info, a character plus the object’s [TYPE] and [TAG], are the only required data for a given object, but most objects will be followed by additional data keywords that describe the object in more detail (overriding otherwise default behaviors). The set of applicable keywords is generally different for each type of object, though any reference can specify the [SHIFT] keyword, which instructs the prefab to randomly shift that object within a certain area, (+/-x, +/-y), so that it doesn’t always appear in the same place.
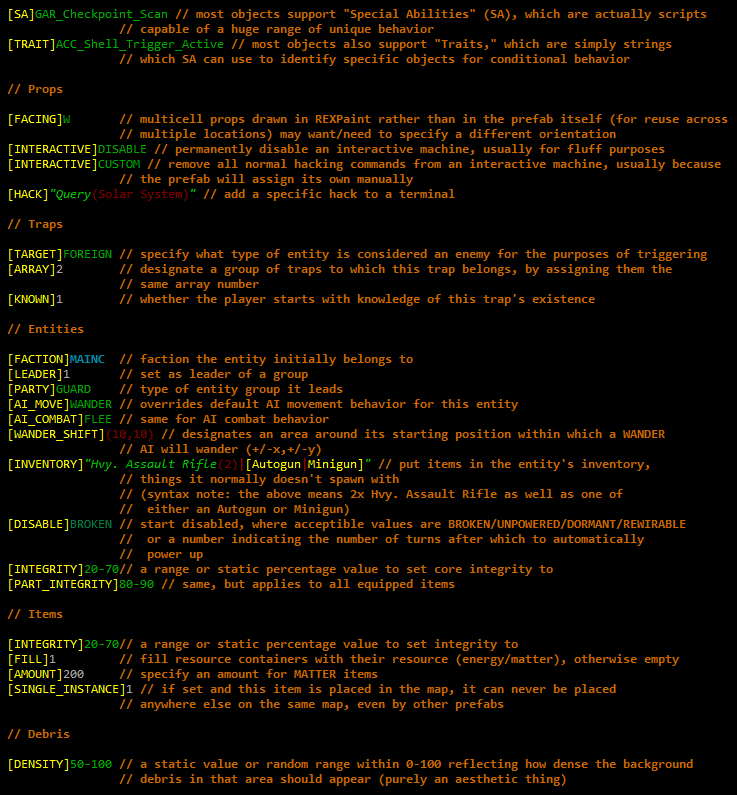
Sample prefab keywords used to expand on different object definitions. Custom syntax highlighting helps parse the file when editing.
Items and entities specifically have more options for their [TAG] value. Quite often it’s desirable to select one from among multiple potential types, a feature supported by additional syntax and keywords.
The first example demonstrates how it’s possible to designate any number of entities from which to randomly select, in that case a G-34 and G-47.
The second example, on the other hand, simply specifies an entity class, and the game will select an entity appropriate for the depth at which the prefab is placed. This is useful for prefabs used across multiple depths, and has the added benefit that any changes to object names (and other values!) do not force reconsideration of existing prefabs. For the same reason, hard-scripting specific object names is avoided where possible.
The third example simply demonstrates random selection between different classes works, too.
Designating a class instead of a specific name may also call for additional keywords (optional), where [CATEGORY] suggests which category to select an entity variant from, where a single class may belong to more than one entity category, [STRONG] tells whether to select an entity that is one level stronger than the current depth, and [FALLBACK] tells the engine to fall back on the weakest variant when technically no variant of the desired class exists at or below the current depth.
Items (and traps, actually) often do the same thing, and can range from extremely specific (Ex 1) to extremely vague (Ex 4). Ex 2 demonstrates just a sampling of the available categories to select from, as away of narrowing down the selection pool--important for balance and controlling the experience! And Ex 3 is a pretty situational one, randomly selecting an item that would normally be equipped by the entity in parenthesis, to allow for thematic loot (the scene of a specific battle, for example).
Where no specific tag is given, the [PROTOTYPE] keyword suggests that the item should be chosen from among prototypes (a better type of item) than common items, [NEVERFAULTY] designates that a chosen prototype should never be a faulty version, and [RATING]+X can be used to have the map generator attempt to choose an “out of depth” item instead (where X is the number of levels higher than the current one to choose from).
The theme of non-static prefab data is an important one, as it’s a relatively cheap way to make even handcrafted content stay fresh despite repeated exposure. To take this theme even further, individual keywords can be modified by various prefixes with different effects:
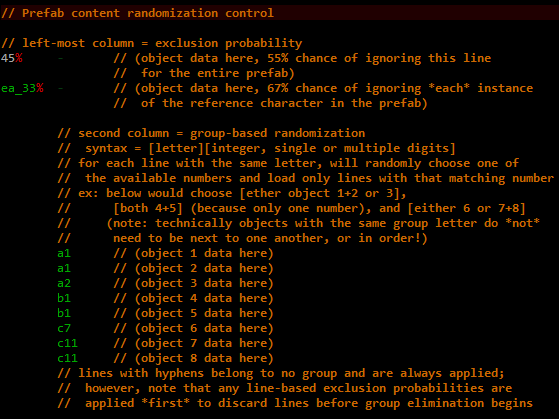
For larger scale randomization we also have two available columns at the beginning of each line (excluded from all of the above samples):
Despite the appeal of randomization, it is often desired that multiple entities or items placed near each other in a prefab should be of the same type, even when randomly selected. Thus by default whenever the object for a reference character was chosen randomly, any cardinally adjacent matching characters will automatically use the same object type (extending as far as necessary in a chain). Where there is a need to allow adjacent objects (even those with matching characters) to be different from one another, the [UNIQUE] keyword can be used to explicitly force that.
Some Statistics
As of today Cogmind contains…
- 148 base types of encounters, 115 of which use prefabs
- 372 prefabs in all (much higher than the number of encounters because some have multiple prefabs, and as explained before not all prefabs are associated specifically with encounters)
- The largest prefab is 100×90
- The smallest is 3×2 :P (mostly a mechanical thing)
- The average is 7×7
- The single encounter with the greatest variety of unique prefabs has 12 to choose from
In total, 25% of encounters are categorized as “fluff,” 15% as “risk vs. reward,” 14% as “danger,” and 46% as “rewards.”







2 Comments
I love this article and the rest in your series. Your attention to detail is amazing and Cogmind is fantastic as a result of it.
I’ve actually been going through the same process with prefabs at the moment, though I didn’t have a good term for them, and this is really helpful and, beyond that, really interesting stuff.
Love the XCom reference, by the way. I was basing my thinking around Dungeons of Dredmor which is 90 -- 100% prefabs all the way, but this is a good approach and I love it.
Hi Matt, thanks. In roguelikes they’re called either “prefabs” or, the other common term especially in traditional fantasy RLs, “vaults.” The latter feels a bit more restrictive in to me in terms of implications, mainly since it originated to describe individual rooms rather than the great variety prefabs might now be used to create.
Too bad I only have so many articles with this kind of source/scripting detail, but it’s rare that I have some technical contribution that’s really worth writing about :P