Previous coverage of the audio development process has taken a look at everything except working with individual sound samples. They are of course the building blocks of the entire system--if they aren’t appropriate and each working to enhance the overall experience, then the game is better off mute. That would save a lot of time, but we’re trying to create an immersive experience, and sound plays a big part in that.
Disclaimer: Before continuing, know that I am by no means a professional sound designer, though I have been playing with Audacity for many years and have a workflow that includes a good number of easy methods for getting results.
Sources
First of all, you may be disappointed to know that nothing I do is made from scratch, and therefore I won’t be showing how that’s done. For that you need the experience to use a digital audio workstation. Sounds created from scratch also don’t suffice when you need lots of realistic non-gamey sounds, which happen to make up a large portion of those in Cogmind because it helps make the world more believable.
Samples available from royalty-free sound effect websites are a great starting point. Years ago it used to be hard to get this stuff, but now there’s tons of it out there. When searching for the right sounds, it often helps to get creative. Even when something doesn’t seem available, other unexpected and common sounds can be substituted. Closeup recordings of automatic car windows are great for robot leg movement, for example. Often times a little modification may be necessary, using some of the methods described below.
Another option popular among indie devs who don’t mind (or on the contrary want) traditional “video game sfx” is to generate them with Bfxr. I first encountered this when it was the original Sfxr and thought it was cool then--the new one is so amazing and powerful it might just blow your mind.
Design
Royalty free sounds are great, but they weren’t made specifically for your game, and there’s a good chance they won’t fit your needs perfectly. Or maybe I’m just picky ;)
I almost always edit sounds in one or more ways. This is where the simplicity and power of Audacity comes in handy. There are plenty of features for the amateur sound engineer and even more available through plugins, though pretty much all you need comes standard with Audacity.
Pitch, Speed & Tempo
Sometimes a sound is just a little too fast, slow, high-pitched, or whatever. Increasing or decreasing pitch, speed, and/or tempo by a certain percentage is a simple way to fix that. These effects are easy to experiment with and can product interesting results (by the way, it’s more efficient to just make an adjustment, accept it and test immediately rather than use the slower “preview” feature--you can always ctrl-z undo the change if you don’t like it). Even significant adjustments of as much as 500% can be used to completely change a sound for a different purpose. Minor changes can also create useful multiple variations on a sound (as described in the previous post this is something that can be done with an audio engine, too…).
Cutting, Pasting & Mixing
Sometimes a short segment of a longer sound effect makes a good complete sound effect itself. Remember that especially shorter effects will sound much different when taken out of context, which can be to your advantage when you need something that is difficult to find on its own.
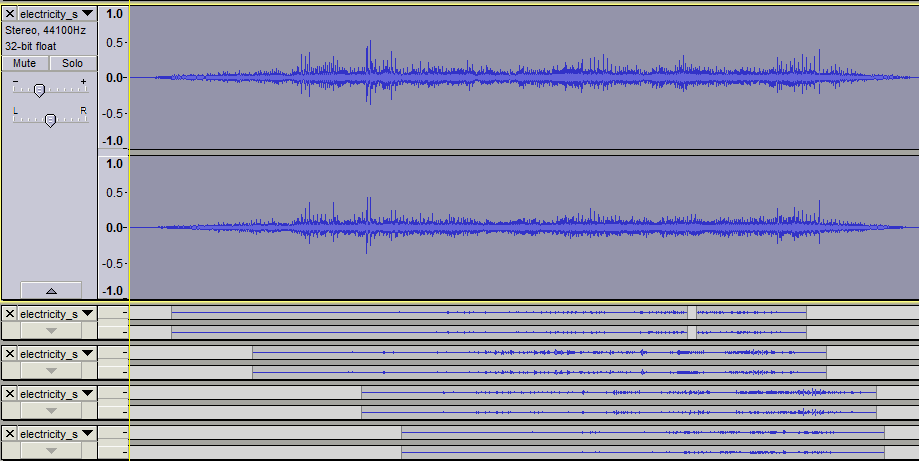
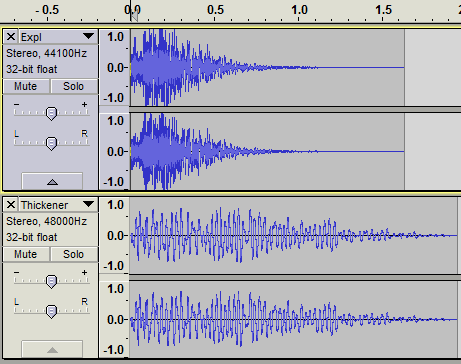
Combining multiple sound effects into one is another way to tailor them for a specific purpose. This can be done by adding them end-to-end, via partial overlap, or even completely overlapping more than one sound. The latter only works when sounds complement each other, not if they occupy a lot of the same sound space.
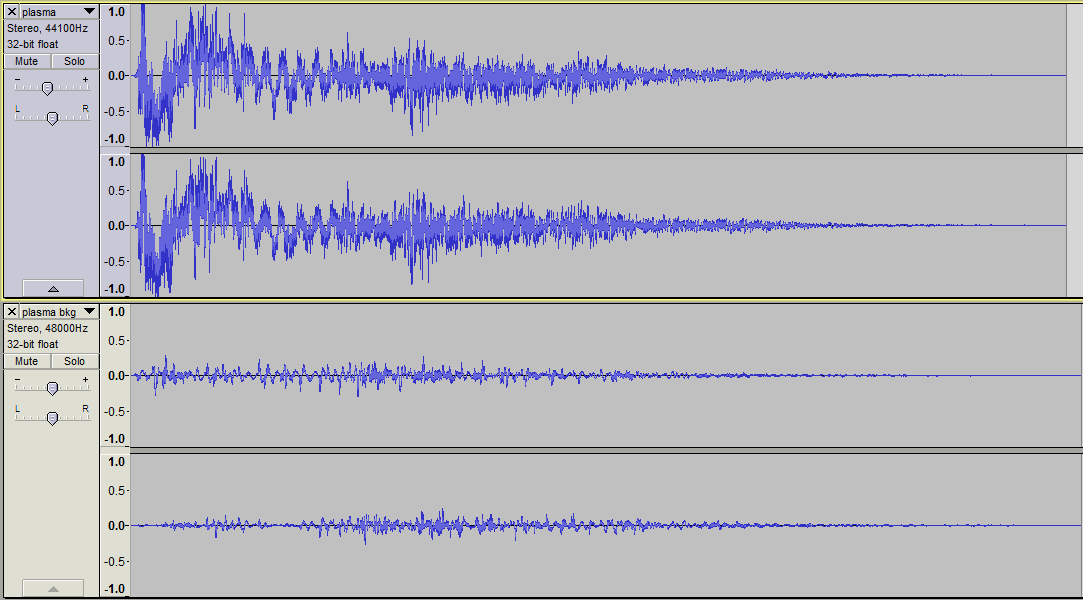
Other examples of multi-layered sounds:

An electromagnetic weapon that layers more and more static onto the background as the projectile progresses.
When testing multi-layered sounds, remember to mute each track in turn and play the full sound with and without it to see what it’s really adding to the overall effect. The difference you hear may suggest other possible improvements.
Also remember that just like extracting segments of sound from a longer one is capable of creating something completely new, so does putting them in a new context.
If your audio engine supports it, layers can also be combined randomly at play time to increase the number of possibilities. A more powerful audio engine (discussed in the previous post) should be able to do this. I don’t use the technique very often because it’s even more time consuming to make sure all combinations will sound good, but it did come in handy for robot death sounds, which layer a random power down sound behind some static and sparks, sometimes along with an additional sound effect. The pool of sounds for each category differs for each robot size class.
Fade In/Out
I use fade effects a lot, though not in the normal sense you might expect (i.e. to very gradually increase/decrease volume). They are useful for repairing a composition, especially after a lot of cutting, pasting and mixing.
It is sometimes hard to avoid creating clicks/glitches at the ends of a cut action. These are easily removed by a 5-10ms fade unnoticeable to the listener.
Partially overlapping sounds mixed into the same sample should generally be cross-faded to help reduce dissonance (unless the sounds are meant to be distinct, like the charging of a weapon before it fires). Make sure volume levels are similar at the central point of overlap, otherwise the transition will be too noticeable:
Real recordings, weapon effects in particular, are often accompanied by echoes that take a while to trail off. If these echoes don’t suit the game environment (and also just to keep sound effects relatively short) you’ll want to cut those off and fade the result. Just be careful that the end result doesn’t sound too abrupt and unnatural.
Volume
I haven’t yet mentioned volume, which doesn’t matter too much because the player can always adjust it, right? Nope. Relative volume of individual samples is incredibly important, since the player can only control the volume of groups of sounds. No amount of in-game adjustment can fix it when one weapon blasts your ears out while the others are relatively subdued by comparison.
For this reason you should always choose a “reference sample” when working on a new game. That’s a sound effect of average volume that you can always compare others to during the design process, ensuring the new sound is quiet enough, or loud enough. If all sounds are compared against the same reference, then you can expect the final results to be fairly normalized when they’re all in the same game.
Note that when changing volume levels of an individual sample in Audacity, it is technically better to use that sample’s volume slider rather than applying an amplify effect. The latter can be a “destructive” process (loses audio data), and is also slower to carry out (if you’re an efficiency nut like me). Sometimes the amplify effect still comes in handy when working with a sample that may be copied multiple times, because Audacity will not copy the slider volume setting to the new track. In some cases I also use amplify anyway because I like to see the waveform at its actual volume level to make a visual comparison with other samples.
Testing Output
Just as a PC game will be played on a huge range of different systems, so the audio will be played through a variety of means. Not everyone will have an identical experience in that regard, so remember to test the audio on different speakers and headsets. Try to make them as close as possible. Among my test audio devices, I have one small headset that loses much of the bass, and another that blasts it out and achieves the same effect at half the volume of the other one.
To reduce the amount of testing necessary, I made a reference chart of the volume settings on all devices and software used during the sound creation process. I aim for in-game volume to default to 70%, and the same for as many audio devices as possible. It’s best to avoid reaching for the maximum volume of any audio system. Hardware doesn’t perform as well at extremes (how many people keep their OS audio at 100%?), and in software (the game) this gives the user some room for upwards adjustment.
Audio Formats
Files are generally saved in a lossless format like .wav, but final audio can safely be compressed using the Ogg Vorbis (.ogg) format to vastly reduce file size without sacrificing much quality at all. This is less important when a game only has a few sounds, but with dozens or hundreds it can mean the difference between a 20 MB download and 100 MB. Audio is often the largest portion of a game’s file size, more so when uncompressed.
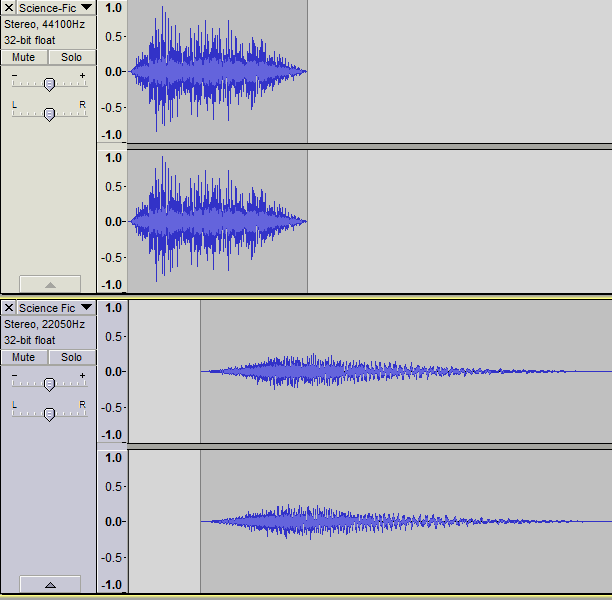
Most sound work is done at a data rate of 44.1 kH/16, the digital standard for CD quality (16 is the bit depth). I have a lot of old sounds lying around and in the past many video games used a lower 22050 Hz rate, so I currently include release everything at that rate. It does lose some of the higher range sounds, but this doesn’t have a huge impact depending on the kind of sound effects in use. I may change it back to 44.1 if/when music is added (a topic for another post), though it’s nice to have the even smaller file sizes of a lower rate. Note that true sound designers would never recommend using 22050 these days.
This is the last of a four-part series on the subject of sound effects. The first gave an overview of sound effects in roguelikes and Cogmind, followed by a look at weapon sfx in particular and an overview of the game’s audio engine.
Note: By request the earlier combat recording has been re-recorded with UI sounds disabled. You can listen to it here.


